honeywell t6 pro installation manual pdf
The Honeywell T6 Pro Installation Manual provides a comprehensive guide for installing and configuring the T6 Pro programmable thermostat. This smart device offers advanced features like geofencing and energy-saving modes, ensuring optimal temperature control. The manual covers compatibility with various HVAC systems, step-by-step installation instructions, and troubleshooting tips to ensure smooth operation. It is essential for both DIY enthusiasts and professionals to follow the manual for proper setup and functionality.
1.1 Overview of the Honeywell T6 Pro Thermostat
The Honeywell T6 Pro Thermostat is a programmable, Wi-Fi-enabled smart thermostat designed for efficient temperature control. It offers advanced features like geofencing, smart home integration, and energy-saving modes. The T6 Pro learns your system’s behavior to optimize heating and cooling, ensuring comfort while reducing energy use. Compatible with heat pumps and conventional HVAC systems, it supports up to three heat and two cool stages. The thermostat is user-friendly, with a sleek design and intuitive interface, making it ideal for modern homes seeking convenience and energy efficiency.
1.2 Importance of the Installation Manual
The Honeywell T6 Pro installation manual is crucial for ensuring safe and correct installation, preventing potential hazards, and guaranteeing optimal performance. It provides essential instructions for compatibility checks and proper setup, avoiding system malfunctions. The manual includes safety guidelines to prevent electrical risks and outlines steps for accessing advanced features like geofencing. Adhering to the manual ensures warranty validity and helps users maximize energy efficiency and comfort. It serves as a comprehensive guide to troubleshooting and maintaining the thermostat effectively, making it indispensable for both professionals and DIY installers.
System Requirements and Compatibility
The Honeywell T6 Pro is compatible with most HVAC systems, requiring 24V AC power and a C wire. It works with Android and iOS devices for smart control.
2.1 Compatible Heating and Cooling Systems
The Honeywell T6 Pro is designed to work with various HVAC systems, including heat pumps and conventional systems. It supports up to three heating and two cooling stages for heat pumps and two heating and two cooling stages for conventional systems. Dual-fuel heat pump systems are also compatible, offering flexible temperature control. However, it is not compatible with electric baseboard heat or millivolt systems, ensuring it is suitable for standard 24V AC systems. Proper compatibility ensures efficient performance and reliable temperature management.
2.2 Required Electrical Specifications
The Honeywell T6 Pro requires a 24V AC power supply for operation. A ‘C’ wire is recommended for consistent power, though it can function with batteries if one isn’t available. The thermostat uses 2 AA batteries as a backup or primary power source. It is not compatible with 120-240V electric baseboard systems or millivolt systems, ensuring safe and efficient operation within standard HVAC setups. Proper electrical connections are crucial for optimal performance and reliability.
2.3 Device Compatibility (Smartphones, Tablets)
The Honeywell T6 Pro is compatible with both Android and iOS smartphones and tablets, enabling seamless smart home integration. The Honeywell Home app, downloadable from the App Store or Google Play, allows users to control and configure the thermostat remotely. This compatibility ensures convenience and flexibility, letting users manage their HVAC system from anywhere. Additionally, the T6 Pro supports Z-Wave certification, enhancing its integration with various smart home systems for a comprehensive connected experience.

Installation Preparation
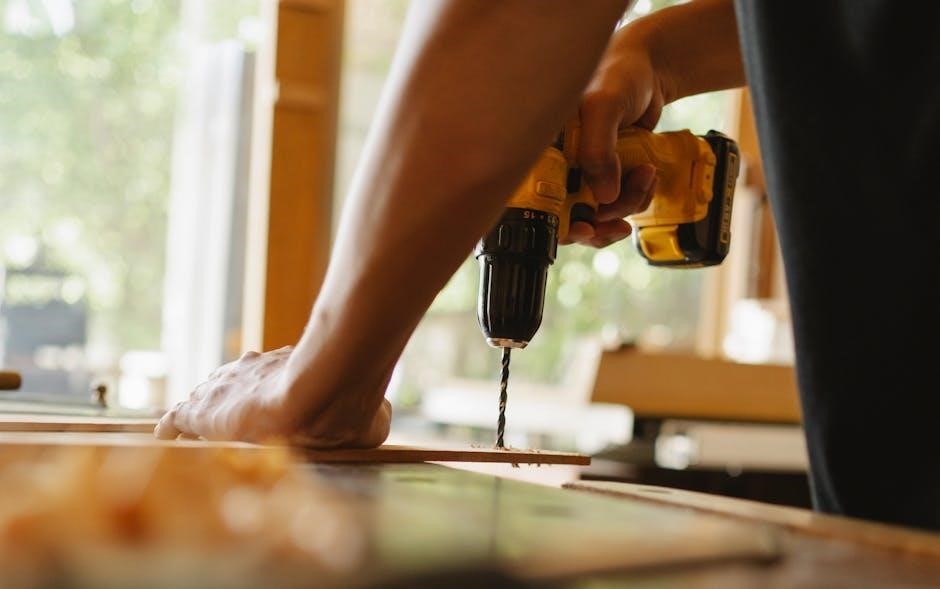
Ensure you have all necessary tools, including a screwdriver, level, and drill. Understand the mounting system and prepare the wall for installation to guarantee a secure fit.
3.1 Tools and Materials Needed
To install the Honeywell T6 Pro Thermostat, gather the following tools and materials: a screwdriver, drill, level, and wall anchors. The package includes the thermostat, UWP Mounting System, Honeywell Standard Installation Adapter, Decorative Cover Plate, screws, and 2 AA batteries. Ensure all components are available before starting. Additional tools like a wire stripper may be needed for wiring connections. Proper preparation ensures a smooth and efficient installation process, avoiding delays or complications.
3.2 Understanding the Mounting System
The Honeywell T6 Pro Thermostat uses the UWP (Universal Wall Plate) Mounting System for easy installation. This system includes a mounting plate and decorative cover plate. The UWP ensures the thermostat is securely fastened to the wall, even over uneven surfaces. To install, level the mounting plate and attach it using screws and anchors. The thermostat then snaps onto the UWP, providing a sleek and stable setup. The system also accommodates optional cover plates to hide paint gaps or junction boxes, ensuring a professional finish. Proper alignment is crucial for accurate temperature sensing and smooth operation.
3.3 Optional Cover Plate Installation
The Honeywell T6 Pro Thermostat offers an optional decorative cover plate to enhance aesthetics. This plate is ideal for covering paint gaps left by previous thermostats or when mounting directly to a junction box. To install, simply separate the cover plate from the mounting plate and attach it after securing the UWP system; The cover plate aligns with the thermostat’s edge, providing a seamless look. It is available in various sizes to fit different wall configurations, ensuring a professional and polished appearance without compromising functionality.
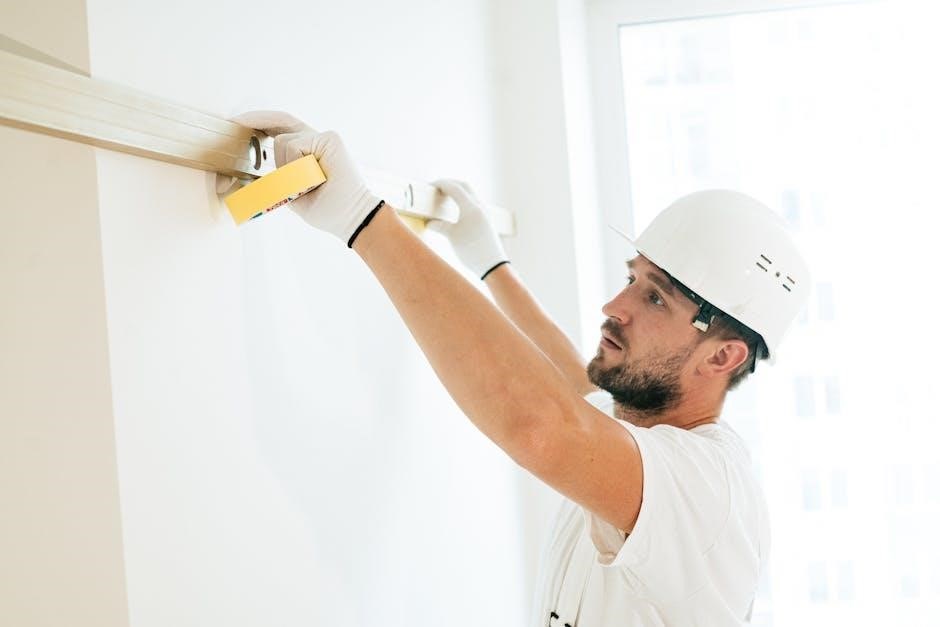
3.4 Preparing the Wall for Installation
Before installing the Honeywell T6 Pro Thermostat, ensure the wall is properly prepared. Check for any damage or unevenness and repair as needed. If using the UWP Mounting System, locate the wall studs to secure the mounting plate. Mark the area where the thermostat will be installed, ensuring it is level and away from direct sunlight or heat sources. Drill pilot holes if necessary, and use anchors to prevent the screws from loosening over time. A well-prepared wall ensures a stable and secure installation, maintaining the thermostat’s performance and aesthetic appeal.

Step-by-Step Installation Guide
The guide outlines a detailed process, starting with turning off power, removing the old thermostat, installing the mounting plate, connecting wires, and attaching the T6 Pro thermostat.
4.1 Turning Off Power to the System
Before starting the installation, ensure the HVAC system’s power is turned off at the circuit breaker or fuse box. Verify the system is completely powered down to avoid electrical shock or damage. If applicable, unplug the furnace or disconnect the power supply. This step is crucial for safety and prevents any accidental activation during the installation process. Always double-check that the power is off using a voltage tester. Failure to do so may result in injury or damage to the system. Proceed only when confirmed the power is off.
4.2 Removing the Old Thermostat
4.2 Removing the Old Thermostat
Gently pull the old thermostat away from the wall-mounted backplate. Be careful not to damage any wires connected to it. Once detached, disconnect the wires from their terminals, taking note of their positions for later reconnection. Label each wire to ensure correct installation of the new thermostat. Handle the wires with care to prevent any damage. Properly securing the wires will facilitate a smooth installation process for the Honeywell T6 Pro Thermostat.
4.3 Installing the Mounting Plate
Mount the Honeywell T6 Pro mounting plate to the wall using the provided screws and anchors. Ensure the plate is level to guarantee proper installation; Handle the plate with care to avoid damage. Align the plate correctly with the wall anchors and secure it firmly. Use the UWP Mounting System if required for additional stability. Follow the manufacturer’s instructions for precise alignment and tightening. Proper installation of the mounting plate is essential for the thermostat’s functionality and overall system performance. Ensure all screws are tightened securely to prevent any movement or misalignment during operation.
4.4 Connecting the Wires
Connect the wires to the Honeywell T6 Pro thermostat according to the labeled terminals on the mounting plate. Insert the R and C wires into their respective terminals, ensuring they are securely fastened. If using a C wire, it is optional but recommended for consistent power. To remove wires, depress the terminal tabs gently. Avoid overtightening, as this could damage the terminals. Double-check the wiring configuration against the manual to ensure correct connections. Proper wire installation is critical for the thermostat to function accurately and safely. Follow the manufacturer’s guidelines for optimal performance.
4.5 Attaching the T6 Pro Thermostat
Once the mounting plate is installed, align the T6 Pro thermostat with the plate, ensuring the tabs on the thermostat match the hooks on the mounting system. Gently push the thermostat onto the plate until it clicks securely into place. Make sure the device is level and properly seated to ensure accurate temperature sensing and smooth operation. If using the UWP Mounting System, hang the thermostat on the top hook and snap the bottom into position. Verify the thermostat is firmly attached before proceeding. Refer to the manual for specific alignment instructions if needed.
4.6 Using the UWP Mounting System
To use the UWP Mounting System, align the T6 Pro thermostat with the mounting plate, ensuring the top hook of the plate is securely engaged. Gently lower the thermostat, allowing the bottom to snap into place. Make sure the device is level and firmly attached. The UWP system allows for easy adjustment and removal without damaging the wall. Once attached, test the thermostat by gently tugging to ensure it is secure. This system provides flexibility and convenience for installation and future adjustments. Proper alignment ensures reliable performance and accurate temperature control. Follow the manual for precise instructions.
First-Time Setup and Configuration
After installation, power on the T6 Pro and follow on-screen prompts to set language, location, and preferences. Configure Wi-Fi and system settings for optimal performance.
5.1 Programming the Thermostat
Programming the Honeywell T6 Pro allows for customized temperature schedules. Use the touchscreen or Honeywell Home app to set heating and cooling preferences. Choose from pre-set schedules or create custom ones based on daily routines. The thermostat learns your system’s response time, adjusting operation for consistent comfort. Enable features like geofencing to automatically adjust settings when leaving or arriving home. Regularly review and update schedules to optimize energy usage and ensure the system runs efficiently year-round. This feature ensures comfort and energy savings are balanced seamlessly.
5.2 Setting Up the Schedule
Setting up a schedule on the Honeywell T6 Pro ensures your home remains comfortable while optimizing energy use. Use the Honeywell Home app or thermostat interface to create a daily schedule with specific temperature settings for different times. Program up to six temperature points per day, aligning with your routine. Adjust the schedule as needed to account for weekends, holidays, or special events. Regularly review and update your schedule to reflect changes in your lifestyle, ensuring energy efficiency and consistent comfort throughout the year. A well-configured schedule enhances both convenience and energy savings.
5.3 Initial System Configuration
After installation, configure the Honeywell T6 Pro by selecting your preferred temperature units (Fahrenheit or Celsius) and setting the current date and time. Choose the operating mode (Heat, Cool, or Off) and configure the fan settings (Auto or On). Use the Installer Setup (ISU) menu to enable advanced features like geofencing and energy-saving modes. Ensure the thermostat is connected to your Wi-Fi network for smart home integration. Refer to the Honeywell Home app for additional configuration options, such as location-based control and schedule customization, to optimize performance and energy efficiency.
Advanced Features and Settings
The Honeywell T6 Pro offers smart home integration, geofencing, and energy-saving modes to optimize comfort and efficiency. These features enhance control and reduce energy consumption seamlessly.
6.1 Smart Home Integration
The Honeywell T6 Pro seamlessly integrates with various smart home systems, enhancing your home’s automation capabilities. Compatible with platforms like Samsung SmartThings and Apple HomeKit, this thermostat allows for voice control via Amazon Alexa or Google Assistant. Through the Honeywell Home app, users can adjust settings, create schedules, and monitor energy usage remotely; This integration not only adds convenience but also optimizes energy efficiency, ensuring your home remains comfortable while reducing energy waste. It’s a perfect solution for those looking to modernize their HVAC control within a smart ecosystem.
6.2 Geofencing and Location-Based Control
The Honeywell T6 Pro offers geofencing, a feature that uses your smartphone’s location to automatically adjust heating and cooling settings. As you leave or approach your home, the thermostat responds by optimizing temperature for energy savings or comfort. This location-based control is easily configured through the Honeywell Home app, allowing you to set boundaries and customize triggers. It ensures your system operates efficiently, reducing energy waste when you’re away while maintaining your preferred temperature upon return. This smart feature enhances convenience and energy efficiency seamlessly.
6.3 Energy-Saving Modes and Settings
The Honeywell T6 Pro features advanced energy-saving modes designed to optimize your heating and cooling usage. The thermostat learns your system’s performance over time, adjusting operations to reach desired temperatures efficiently. It includes smart scheduling and geofencing to minimize energy waste when you’re away; Additionally, the T6 Pro offers a compressor protection feature, preventing rapid restarts to reduce wear and tear. These settings ensure your system runs efficiently, saving energy while maintaining comfort. Customizable energy-saving modes allow you to balance convenience and conservation effortlessly.

Maintenance and Troubleshooting
Regular cleaning ensures optimal performance. Replace batteries promptly when the low battery icon appears; Refer to the troubleshooting guide for resolving common issues efficiently.
7.1 Cleaning the Thermostat
Cleaning the Honeywell T6 Pro Thermostat is essential for maintaining its performance. Use a soft, dry cloth to gently wipe the display and outer casing. Avoid harsh chemicals or liquids, as they may damage the screen or internal components. Regularly cleaning ensures accurate temperature readings and smooth operation. For more thorough cleaning, power down the device and carefully remove dust from vents using compressed air. Always refer to the official manual for detailed cleaning instructions to prevent damage and ensure longevity.
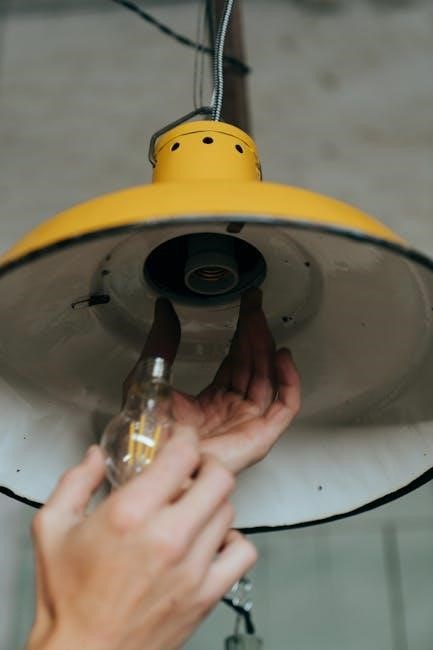
7.2 Replacing Batteries
To replace the batteries in your Honeywell T6 Pro Thermostat, first turn off the power to the HVAC system. Gently pull the thermostat from the wall plate to access the battery compartment. Remove the old AA batteries and insert new ones, ensuring the polarity matches the diagram. Reattach the thermostat to the wall plate and turn the power back on. The low battery icon should disappear, confirming successful replacement. Always use high-quality alkaline batteries for optimal performance and dispose of old batteries responsibly.
7.3 Common Issues and Solutions
Common issues with the Honeywell T6 Pro Thermostat include connectivity problems, display malfunctions, or temperature inaccuracies. For connectivity issues, ensure the thermostat is properly paired with your smartphone or hub. If the display doesn’t turn on, check the battery levels or wiring connections. Temperature inaccuracies may require recalibrating the sensor or adjusting the schedule settings. Refer to the manual for detailed troubleshooting steps or reset the thermostat to factory settings if issues persist. Always verify proper installation and power supply for optimal performance.
7.4 Resetting the Thermostat
To reset the Honeywell T6 Pro Thermostat, start by turning off the HVAC system at the thermostat or circuit breaker. Remove the AA batteries from the back of the device and wait for 5 minutes to discharge any residual power. If using a C wire, ensure it is disconnected during this process. Reinstall the batteries and reconnect the C wire if applicable. Turn the power back on and allow the thermostat to reboot. After the reset, reconfigure the settings, including the time, date, and temperature preferences, as the reset will erase all custom settings. If issues persist, consult the user manual or contact Honeywell support for further assistance.
Additional Resources
Access the official Honeywell T6 Pro manual PDF, online support, and community forums for detailed guidance, troubleshooting, and updates to ensure optimal thermostat performance and functionality.
8.1 Official Honeywell T6 Pro Manual PDF
The official Honeywell T6 Pro manual PDF is the primary resource for detailed installation, configuration, and troubleshooting guidance. Available on Honeywell’s official website, this comprehensive document covers everything from system requirements to advanced features. It includes step-by-step installation instructions, wiring diagrams, and compatibility information for various HVAC systems. The manual also provides insights into energy-saving modes, geofencing setup, and smart home integration. Users can download the PDF for free, ensuring they have all the necessary information to optimize their thermostat’s performance. Refer to the customer support section for direct links to the manual.
8.2 Online Support and Customer Service
Honeywell provides extensive online support and customer service resources for the T6 Pro thermostat. Users can access troubleshooting guides, installation manuals, and FAQs on the official Honeywell website. Additionally, Honeywell offers a toll-free customer care hotline (1-800-468-1502) for direct assistance. The website also features downloadable resources, such as the T6 Pro manual PDF, ensuring users have everything needed for installation and maintenance. These support options are designed to address common issues and provide a seamless experience for T6 Pro users.
8.3 Community Forums and User Guides
The Honeywell T6 Pro community forums offer a wealth of knowledge and peer-to-peer support. Users can share installation experiences, solve common issues, and gain insights from experienced installers. Additionally, detailed user guides are available online, providing in-depth instructions for troubleshooting and advanced configurations. The Honeywell Home app also serves as a resource hub, offering guides and tutorials for optimal thermostat performance. These community-driven resources complement the official manual, ensuring users have diverse support channels for their T6 Pro installation and operation needs.

Warranty and Support Information
Honeywell offers a comprehensive warranty and dedicated customer support for the T6 Pro Thermostat. Contact Honeywell Customer Care at 1-800-468-1502 for assistance with warranty claims or technical issues.
9.1 Warranty Policy Overview
The Honeywell T6 Pro Thermostat is backed by a comprehensive warranty program, ensuring customer satisfaction. The warranty covers defects in materials and workmanship for a specified period, typically two years from the date of purchase. This includes repair or replacement of faulty components at no additional cost to the user. For detailed terms and conditions, users should refer to the official Honeywell T6 Pro Installation Manual or contact Honeywell Customer Support directly. Proper registration and adherence to installation guidelines are recommended to maintain warranty validity.
9.2 Contacting Honeywell Support
For assistance with the Honeywell T6 Pro Thermostat, customers can contact Honeywell Support directly. The toll-free customer care number is 1-800-468-1502, available to address installation, troubleshooting, and general inquiries. Additionally, users can visit the official Honeywell Home website for online support resources, including FAQs, user manuals, and installation guides. The website also provides access to community forums and technical support specialists. Reaching out to Honeywell Support ensures prompt resolution of any issues related to the T6 Pro Thermostat, helping users maximize its performance and functionality.
Compatibility with Other Systems
The Honeywell T6 Pro Thermostat is compatible with heat pumps, conventional HVAC systems, and Z-Wave smart home systems. It supports up to three heat and two cool stages for heat pumps and two heat and two cool stages for conventional systems. However, it does not work with electric baseboard heat or millivolt systems, ensuring versatile integration with most modern HVAC setups for enhanced functionality and smart home control.
10.1 Heat Pump Systems
The Honeywell T6 Pro Thermostat is fully compatible with heat pump systems, supporting up to three heat and two cool stages. It works seamlessly with dual-fuel heat pump systems, optimizing performance and efficiency. The thermostat learns the system’s behavior over time, adjusting operations to maintain consistent temperatures while minimizing energy use. However, it is not compatible with electric baseboard heat or millivolt systems. This compatibility ensures reliable operation and enhanced comfort for homes utilizing heat pump technology.
10.2 Conventional HVAC Systems
The Honeywell T6 Pro Thermostat is compatible with conventional HVAC systems, supporting up to two heat and two cool stages. It enhances system efficiency through smart features like geofencing and scheduling; The thermostat requires a 24V AC power source and may need a C-wire, depending on the setup. However, it’s incompatible with electric baseboard heat and millivolt systems, making it ideal for standard HVAC configurations. This ensures reliable operation and improved comfort in homes with traditional heating and cooling setups.
10.3 Z-Wave and Smart Home Systems
The Honeywell T6 Pro Thermostat integrates seamlessly with Z-Wave and smart home systems, offering enhanced control and connectivity. Its Z-Wave Plus certification allows for efficient communication with other smart devices, enabling remote operation and automation. Users can manage their HVAC system through compatible hubs and apps, creating a unified smart home experience. This integration ensures energy efficiency, convenience, and compatibility with various smart home ecosystems, making it a versatile choice for modern households seeking advanced automation capabilities.
Tips for Optimal Performance
Ensure proper airflow, update software regularly, and maintain battery levels for optimal performance. Avoid direct sunlight and heat sources to ensure accurate temperature readings and efficiency.
11.1 Placement Recommendations
For optimal performance, place the Honeywell T6 Pro Thermostat in a central location, away from direct sunlight and heat sources. Ensure it is at least 1.2 to 1.5 meters above the floor to avoid drafts. Keep it away from windows, doors, and skirting boards to maintain accurate temperature readings. Avoid areas near radiators, fireplaces, or appliances that generate heat. Proper placement ensures consistent temperature regulation and energy efficiency. Do not install near furniture or obstacles that may block airflow or interfere with sensor accuracy. Optimal placement ensures reliable operation and energy savings.
11.2 Avoiding Common Installation Mistakes
When installing the Honeywell T6 Pro Thermostat, avoid common mistakes like incorrect wiring connections or not leveling the mounting plate. Ensure the power to your HVAC system is turned off before starting. Do not skip steps in the manual, as this can lead to improper configuration. Avoid rushing the setup process, as this may result in inaccurate temperature readings or system malfunctions. Always double-check wire labels and connections to prevent errors. Following the manual carefully ensures a smooth and successful installation. Consult the manual if unsure about any step.
11.3 Regular Maintenance Tips
Regular maintenance is crucial for optimal performance of your Honeywell T6 Pro Thermostat. Clean the device periodically to remove dust and debris that may affect temperature accuracy. Replace batteries when the low-battery icon appears to avoid system interruptions. Check wire connections regularly to ensure they are secure and not damaged. Update the thermostat software whenever new updates are available. Additionally, ensure the thermostat is level and free from obstructions. By following these maintenance tips, you can extend the lifespan of your thermostat and maintain energy efficiency.
12.2 Encouragement for Further Exploration
Explore advanced features and settings to maximize your Honeywell T6 Pro Thermostat’s potential. Refer to the manual and online resources for detailed guides and support options.
12.1 Final Thoughts on the T6 Pro Installation
Installing the Honeywell T6 Pro Thermostat is a straightforward process when following the manual. The UWP Mounting System simplifies wall installation, and the optional cover plate ensures a clean finish. Compatibility with various HVAC systems and smart home integration makes it versatile. The thermostat’s energy-saving features and geofencing capabilities enhance comfort and efficiency. Proper installation ensures optimal performance, so adhering to the manual is crucial. For any post-installation issues, refer to the troubleshooting section or contact Honeywell support for assistance.
Now that the Honeywell T6 Pro is installed, it’s time to explore its full potential. Discover advanced features like geofencing and smart home integration to optimize your comfort and energy savings. Dive into programmable schedules and energy-saving modes to tailor the system to your lifestyle. For deeper insights, refer to the official manual, online support, or community forums. Continuous learning will help you maximize the T6 Pro’s capabilities, ensuring it operates efficiently and effectively for years to come. Enjoy the benefits of a smarter, more efficient home.