origami flower instructions pdf
Origami flowers are delicate, handcrafted creations that combine artistry and simplicity․ They offer a meaningful way to express emotions through intricate designs, available in free PDF guides for all skill levels․
1․1 What Are Origami Flowers?
Origami flowers are intricate, handcrafted designs made from folded paper, mimicking real blooms like roses, lilies, and cherry blossoms․ They are created using various techniques and paper types, such as colored or patterned sheets, to achieve realistic and visually appealing results․ These flowers are often used as gifts, decorations, or artistic expressions, blending tradition with creativity․ With step-by-step guides available in PDF formats, anyone can learn to craft these delicate pieces, making origami flowers accessible to enthusiasts of all skill levels․ Their beauty lies in their simplicity and the precision required to bring each petal to life․
1․2 History and Cultural Significance of Origami Flowers
Origami flowers trace their roots to ancient Japan, where origami emerged as a revered art form․ These delicate creations symbolize beauty, impermanence, and life’s fleeting nature․ Historically, origami flowers were used in ceremonies, gifts, and decorations, reflecting their cultural importance․ In Japanese tradition, they often represented emotions, wishes, and spiritual connections․ The art form has evolved globally, blending traditional techniques with modern designs․ Today, origami flowers are cherished worldwide for their elegance and the patience they require․ Their cultural significance endures, making them a timeless symbol of craftsmanship and artistic expression․ This enduring legacy inspires creators to explore and innovate․
1․3 Why Create Origami Flowers?
Creating origami flowers is a therapeutic and rewarding hobby that combines creativity with relaxation․ It allows individuals to express their artistic side while producing beautiful, delicate designs․ Origami flowers make thoughtful gifts, adding a personal touch to special occasions․ They can also be used to decorate homes, bringing a touch of elegance to any space․ Additionally, the process of folding paper helps improve patience and fine motor skills․ With free PDF guides readily available, anyone can learn to craft stunning origami flowers, making it an accessible and enjoyable activity for all skill levels․ It’s a perfect way to unwind and create something truly meaningful․
Materials Needed for Origami Flowers
To create origami flowers, you’ll need square paper, scissors, and a ruler․ Colored paper adds vibrancy, while green paper can craft stems for a realistic touch․
2․1 Types of Paper for Origami Flowers
The choice of paper is crucial for creating origami flowers․ Common options include kami (traditional origami paper), washi (Japanese paper), and chiyogami (colorful patterned paper)․ Kami is ideal for beginners due to its durability and smooth finish․ Washi, made from natural fibers, offers a more authentic, textured look․ Chiyogami, with its vibrant designs, adds visual appeal to the finished flowers․ Colored paper is also widely used to achieve different effects, from subtle tones to bold statements․ Many free PDF guides provide detailed recommendations for selecting the right paper, ensuring your origami flowers turn out as beautifully as possible․
2․2 Tools and Accessories (e․g․, Scissors, Ruler, etc․)
Creating origami flowers requires a few essential tools to ensure precision and ease․ A sharp pair of scissors is necessary for cutting paper to the desired size․ A ruler helps measure and align folds accurately, while a bone folder or similar tool can create crisp creases․ A flat surface, like a cutting mat, provides a stable workspace․ Optional accessories include a pencil for marking folds and a spray bottle to slightly dampen the paper, making it more pliable․ These tools enhance the folding process and help achieve professional-looking results․ Having them ready ensures a smoother and more enjoyable origami experience․

Basic Origami Folding Techniques
Mastering essential folds like valley and mountain folds is key to creating origami flowers․ Start by folding a square base, a fundamental step in most designs, and practice consistently for precision․
3․1 Understanding Basic Folds (Valley Fold, Mountain Fold, etc․)
Mastering basic folds is essential for creating origami flowers․ A Valley Fold involves folding paper downward, forming a crease that resembles a valley․ Conversely, a Mountain Fold creates an upward crease, mimicking a mountain ridge․ These foundational techniques are crucial for shaping petals and layers․ Practice these folds to achieve crisp, precise creases, which are vital for the structural integrity of your flower․ Start with a square base and experiment with these folds to build confidence․ Clear diagrams in PDF guides can help visualize each step, ensuring accuracy and symmetry in your designs․
3․2 How to Create a Square Base
Creating a square base is the foundation for most origami flowers․ Start with a square piece of paper and ensure all sides are equal․ Fold the paper diagonally to form a triangle, then unfold it to create a crease․ Next, fold the paper in half vertically and horizontally, forming additional creases that intersect at the center․ These creases will guide your folds․ Fold each corner to the center, ensuring alignment with the creases․ Flip the paper over and repeat the process on the other side․ This method ensures a symmetrical and sturdy base, essential for constructing intricate origami flower designs․ Precision is key for a professional finish․
Step-by-Step Guide to Making an Origami Flower
Discover a comprehensive guide to crafting origami flowers with free downloadable PDF instructions․ Learn step-by-step techniques to create beautiful blooms, from basic folds to intricate petal designs․
4․1 Step 1: Create the Initial Square Base
To begin making an origami flower, start by creating a square base․ Take a square piece of paper and ensure all sides are equal․ Fold the paper in half diagonally to form a triangle, then unfold it to reveal a crease․ This crease will help guide your folds․ Next, fold the paper in half along the other diagonal, creating another crease․ These creases will ensure symmetry․ Finally, fold the paper in half horizontally and then vertically, aligning the edges carefully to form a smaller square․ This square base is the foundation for your origami flower, allowing you to build petals and achieve a balanced design․
4․2 Step 2: Fold the Paper to Create Petal Shapes
Once the square base is ready, fold the paper diagonally to create a triangle․ Repeat this process to form multiple triangular layers, which will serve as the foundation for the petals․ Next, fold each corner of the triangle inward, ensuring the edges align neatly to create a petal shape․ Gently lift and shape each petal to achieve a natural, curved appearance․ For intricate designs, fold the edges of the petals slightly inward to add depth․ Follow the diagrams in the origami flower instructions PDF for precise guidance․ Ensure symmetry by folding each petal identically, as this will enhance the flower’s realistic look․
4․3 Step 3: Assemble the Flower
With the petal shapes prepared, gently bring them together to form the flower’s center․ Align the bases of the petals and secure them by tucking the edges under each other; Ensure symmetry by adjusting each petal’s position․ For added stability, you can use a small dot of glue or fold a central triangle to hold the petals in place․ Refer to the origami flower instructions PDF for visual guidance․ Once assembled, fluff out the petals to create a natural, blooming effect․ This step transforms individual folds into a cohesive, lifelike flower, ready for finishing touches like stems or leaves․
4․4 Step 4: Add Finishing Touches
Once the flower is assembled, refine its appearance by gently adjusting the petals for a natural look․ Use a small dab of glue to secure any loose edges, ensuring the flower holds its shape․ For added realism, carefully curl or shape the petals using your fingers or a tool․ Consider adding a stem made from green paper or wire for a complete look․ Finally, enhance details like the center of the flower with a small bead or marker․ These finishing touches transform the origami into a polished, professional piece, ready for display or gifting․
Advanced Origami Flower Designs
Advanced origami flower designs, such as 3D roses and lilies, offer intricate details for skilled crafters․ PDF guides provide step-by-step instructions and tips for realism․
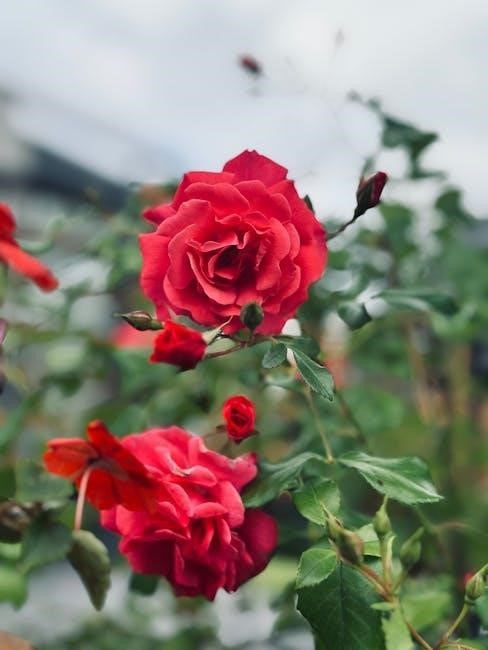
5․1 How to Make a 3D Origami Rose
Creating a 3D origami rose involves precise folding techniques to achieve a lifelike appearance․ Start with a square sheet of paper, preferably colored on one side․ Use valley and mountain folds to shape the petals, ensuring symmetry․ Follow step-by-step instructions to layer the petals and form the flower’s center․ Patiently fold and adjust each petal to create a natural, three-dimensional effect․ The result is a stunning, realistic rose that can be customized with stems or leaves for added elegance․ Detailed guides and diagrams in origami flower instructions PDFs can help master this intricate design, making it a rewarding project for enthusiasts of all skill levels․
5․2 Creating an Origami Lily
The origami lily is a stunning and elegant design that captures the beauty of nature․ To begin, use green and colored origami paper for the leaves and petals․ Start by folding the paper to create petal shapes, ensuring symmetrical edges for a realistic look․ Next, assemble the petals around a central point to form the flower’s core․ Follow the step-by-step instructions in the free PDF guide to achieve precise folds․ Once assembled, add a stem and leaves for a complete look․ This design is perfect for gifts or home decor, offering a delicate yet vibrant appearance that mimics real lilies․
5․3 Designing a Cherry Blossom
Creating a cherry blossom through origami involves capturing its delicate, iconic appearance․ Start by folding a square base, then craft thin, rounded petals․ Use pink paper for authenticity․ Follow step-by-step PDF guides to ensure precision․ Begin with a valley fold to form the center, then create multiple petal layers․ Each petal should be slightly curved for a natural look․ Assemble the layers, ensuring symmetry․ Add a green stem and leaves for a finished touch․ Detailed diagrams in free downloadable instructions help master this design, making it a stunning piece for gifts or home decor․ Practice is key to achieving the blossom’s elegant simplicity․
Enhancements and Customization
Enhance your origami flowers by adding stems, leaves, and using colored paper․ Layering petals creates realistic blooms, while arranging multiple flowers adds decorative appeal․
6․1 Adding a Stem to Your Origami Flower
Adding a stem to your origami flower enhances its realism and makes it more versatile for gifts or decorations․ Use floral wire or a rolled paper strip, attaching it by inserting one end into the flower’s base․ Secure it with a small dot of glue for stability․ Adjust the stem length as needed and optionally wrap it with green paper for a natural look․ This simple addition transforms your origami flower into a charming, three-dimensional piece perfect for arrangements or individual displays․
6․2 Incorporating Leaves
Adding leaves to your origami flowers enhances their realism and aesthetic appeal․ Use green-colored paper to craft leaf shapes, folding them using valley or mountain techniques․ Attach leaves symmetrically around the stem or base for balance․ Some designs feature intricate leaf details, while others keep it simple․ Ensure leaves are proportional to the flower size for a natural look․ Follow step-by-step guides in origami flower PDFs to master leaf folding and attachment․ This addition complements the flower’s beauty, making it more lifelike and visually striking․ Experiment with different leaf styles to personalize your creations, adding depth and character to your origami arrangements․
6․3 Using Colored Paper for Different Effects
Colored paper adds vibrancy and personalization to origami flowers, allowing creators to craft blooms that match occasions or preferences․ Using contrasting shades can enhance petal details, while metallic or glitter papers create a luxurious look․ For instance, red paper is ideal for roses, while pastel hues mimic cherry blossoms․ Experimenting with patterned or textured paper adds depth and uniqueness․ Layering colored papers can also create dimensional effects, making flowers appear more lifelike․ This versatility ensures each origami flower is a one-of-a-kind piece, perfect for gifts, decorations, or artistic displays․ Color choice is key to achieving the desired aesthetic and emotional impact․
Resources for Origami Flower Instructions
Discover free origami flower instructions PDF downloads, featuring clear diagrams and step-by-step guides․ Video tutorials and online communities offer additional support for mastering various designs․
7․1 Free Origami Flower Instructions PDF Download
Discover a wide variety of free origami flower instructions available for download in PDF format․ These guides offer step-by-step diagrams and clear instructions, perfect for beginners and experienced crafters alike․ From classic roses to intricate lilies, each PDF provides detailed folding techniques to help you create stunning floral designs․ Many downloads include tips for customizing your flowers with colored paper, stems, and leaves․ Websites like origami-flower․in and crafting blogs offer these resources, ensuring you can easily print and follow along․ Whether you’re making gifts or decorating your home, these PDFs are an excellent starting point for your origami journey․
7․2 Video Tutorials for Origami Flowers
Video tutorials are an excellent resource for mastering origami flowers, offering visual step-by-step guidance․ Platforms like YouTube provide countless tutorials, from basic to intricate designs․ These videos often complement free PDF instructions, allowing learners to follow along dynamically․ Many tutorials focus on specific flowers, such as roses or lilies, while others cover general techniques like petal folding and assembly․ Beginners benefit from slow-paced demonstrations, while advanced creators can explore complex designs․ Popular channels like “Origami Spirit” and “Paper Kawaii” are renowned for their clear instructions․ These videos are ideal for visual learners, making the process of creating origami flowers more accessible and enjoyable․
7․3 Online Communities and Forums for Origami Enthusiasts
Online communities and forums are vibrant spaces where origami enthusiasts share ideas, collaborate, and learn․ Platforms like Reddit’s r/origami, Facebook groups, and specialized forums host discussions on techniques, designs, and resources․ Many users exchange tips, showcase their work, and provide feedback, fostering a supportive environment․ These communities often share links to free origami flower instructions and PDFs, making them invaluable for beginners and experts alike․ Staying connected with fellow enthusiasts helps keep creativity flowing and ensures access to the latest trends and inspiration in origami art․ Active participation can lead to meaningful connections and continuous improvement in crafting origami flowers․
Common Mistakes and Solutions
Common mistakes include uneven folds and misaligned petals․ Solutions involve double-checking each fold and using reference guides for accuracy․ Patience is key to achieving symmetry․
8․1 Troubleshooting Folding Errors
When creating origami flowers, folding errors can occur due to misalignment or improper creases․ To fix this, refer to the free PDF guides, which provide clear diagrams and step-by-step instructions․ Ensure the paper is aligned correctly before making folds, and use tools like a ruler or bone folder for sharp creases․ If petals appear uneven, check the initial folds for accuracy․ Practice each step patiently, as precision is key to achieving the desired shape․ These resources also offer tips for correcting common mistakes, helping you master intricate designs with ease and confidence․
8․2 Tips for Achieving Symmetry
Achieving symmetry in origami flowers requires precision and patience․ Use a ruler to measure folds, ensuring both sides of the paper align perfectly․ Fold slowly and check each layer to maintain balance․ Practice folding identical petals separately before assembling the flower․ Use creases as guides to mirror movements on both sides․ Avoid over-folding, as it can distort the shape․ For complex designs, start with a square base and ensure each petal is evenly spaced․ Symmetry enhances the beauty of origami flowers, making them appear more lifelike and professional․ Regular practice will help master this essential skill․

Creative Uses for Origami Flowers
Origami flowers make thoughtful gifts, enhance home decor, and add charm to crafts․ Their versatility allows them to be personalized and shared, guided by downloadable PDF instructions․
9․1 Origami Flowers as Gifts
Origami flowers make thoughtful and unique gifts, offering a personal touch that store-bought items often lack․ Their delicate, handmade beauty conveys deep emotion and care․ You can customize them using colored paper or add stems and leaves for a polished look․ Packaging them with a personalized note or a small memento enhances their charm․ Additionally, sharing the process of creating origami flowers can be a meaningful experience, fostering connection and creativity․ For those interested, free PDF guides are available online, making it easier to craft and give these lovely gestures․ Origami flowers truly capture the essence of heartfelt giving․
9․2 Decorating Your Home with Origami Flowers
Origami flowers bring a touch of elegance and whimsy to any space․ Use them to brighten vases, walls, or mantels․ Their delicate designs add charm to rooms․ Garlands or mobiles made from these flowers create unique decor․ With free origami flower instructions PDF, crafting beautiful pieces is easy․ Experiment with colored paper for vibrant displays․ Add stems and leaves for a lifelike appearance․ These flowers are perfect for seasonal themes or everyday beauty․ They also make thoughtful gifts or personal creative projects․ Transform your space with these timeless, handcrafted decorations that inspire joy and serenity․
9․3 Using Origami Flowers in Crafts
Origami flowers add a charming, handmade touch to various craft projects․ They can be used to embellish scrapbook pages, greeting cards, or wedding decorations․ With free PDF guides, crafters can create intricate designs to suit any theme․ These flowers also make beautiful brooches or hair accessories when attached to pins or clips․ Incorporating them into seasonal decor, like wreaths or garlands, brings a personal and artistic flair․ Additionally, origami flowers can be combined with other materials, such as ribbons or beads, to create unique 3D collages or mobiles․ Their versatility makes them a popular choice for both traditional and modern crafting projects․
Creating origami flowers is a fulfilling craft that combines art and precision․ With free PDF guides, anyone can learn․ Keep practicing to master these beautiful designs․
10․1 Final Thoughts on Making Origami Flowers
Creating origami flowers is a rewarding journey that combines patience, creativity, and precision․ From simple designs to intricate models, each flower tells a story of dedication and artistry․ With free PDF guides readily available, anyone can master the craft, regardless of skill level․ The process not only fosters mindfulness but also offers a sense of accomplishment․ Experiment with colors, shapes, and enhancements to make your flowers unique․ Whether for personal enjoyment or as heartfelt gifts, origami flowers bring joy and beauty to any setting․ Keep exploring, practicing, and sharing your creations—each fold is a step toward mastering this timeless art form․
10․2 Encouragement to Keep Practicing
Mastering origami flowers takes time and patience, but the journey is incredibly rewarding․ Even if your first attempts don’t turn out perfectly, remember that every fold brings you closer to creating something beautiful․ Embrace mistakes as part of the learning process and stay consistent․ With each attempt, your skills will improve, and your confidence will grow․ Don’t hesitate to explore free PDF guides and video tutorials for guidance․ Celebrate small victories, like mastering a single petal, and use them as motivation to keep going․ The satisfaction of crafting a stunning origami flower is worth the effort—so keep folding, experimenting, and enjoying the creative process!